Webappbuild
ML모델을 사용하는 웹앱 빌드
데이터 정리
NUFORC의 데이터베이스에서 가져온 지난 세기 동안의 UFO목격과 같은 이 세상에 없는 데이터 세트에 대해 ML모델을 훈련합니다.
NUFORC의 UFO목격 데이터(ufos.csv)에는 목격을 한 장소, 물체에 대한 열이 포함되어 있습니다.
1. ufos.csv를 가져오고 샘플 데이터 셋을 살펴봅니다.
import pandas as pd
import numpy as np

ufos = pd.read_csv('ufos.csv')
ufos.head()
| datetime | city | state | country | shape | duration (seconds) | duration (hours/min) | comments | date posted | latitude | longitude | |
|---|---|---|---|---|---|---|---|---|---|---|---|
| 0 | 10/10/1949 20:30 | san marcos | tx | us | cylinder | 2700.0 | 45 minutes | This event took place in early fall around 194... | 4/27/2004 | 29.883056 | -97.941111 |
| 1 | 10/10/1949 21:00 | lackland afb | tx | NaN | light | 7200.0 | 1-2 hrs | 1949 Lackland AFB, TX. Lights racing acros... | 12/16/2005 | 29.384210 | -98.581082 |
| 2 | 10/10/1955 17:00 | chester (uk/england) | NaN | gb | circle | 20.0 | 20 seconds | Green/Orange circular disc over Chester, En... | 1/21/2008 | 53.200000 | -2.916667 |
| 3 | 10/10/1956 21:00 | edna | tx | us | circle | 20.0 | 1/2 hour | My older brother and twin sister were leaving ... | 1/17/2004 | 28.978333 | -96.645833 |
| 4 | 10/10/1960 20:00 | kaneohe | hi | us | light | 900.0 | 15 minutes | AS a Marine 1st Lt. flying an FJ4B fighter/att... | 1/22/2004 | 21.418056 | -157.803611 |
2. ufos데이터를 새로운 제목의 작은 데이터 프레임으로 변환한 뒤, 필드에서 고유한 값을 확인합니다.
ufos = pd.DataFrame({'Seconds': ufos['duration (seconds)'], 'Country': ufos['country'],'Latitude': ufos['latitude'],'Longitude': ufos['longitude']})

ufos.Country.unique()
array(['us', nan, 'gb', 'ca', 'au', 'de'], dtype=object)
3. null값이 있다면 삭제하고 처리해야 하는 데이터 양을 줄이기 위해 1-60초 사이의 관찰만을 가져옵니다.
ufos.dropna(inplace=True)

ufos = ufos[(ufos['Seconds'] >= 1) & (ufos['Seconds'] <= 60)]

ufos.info()
<class 'pandas.core.frame.DataFrame'>
Index: 25863 entries, 2 to 80330
Data columns (total 4 columns):
 #   Column     Non-Null Count  Dtype
---  ------     --------------  -----
 0   Seconds    25863 non-null  float64
 1   Country    25863 non-null  object
 2   Latitude   25863 non-null  float64
 3   Longitude  25863 non-null  float64
dtypes: float64(3), object(1)
memory usage: 1010.3+ KB
4. Scikit-learn을 통해 국가의 텍스트 값을 숫자로 변환시킨뒤, LabelEncoder을 통해 데이터를 알파벳순으로 인코딩합니다.
from sklearn.preprocessing import LabelEncoder

ufos['Country'] = LabelEncoder().fit_transform(ufos['Country'])

ufos.head()
| Seconds | Country | Latitude | Longitude | |
|---|---|---|---|---|
| 2 | 20.0 | 3 | 53.200000 | -2.916667 |
| 3 | 20.0 | 4 | 28.978333 | -96.645833 |
| 14 | 30.0 | 4 | 35.823889 | -80.253611 |
| 23 | 60.0 | 4 | 45.582778 | -122.352222 |
| 24 | 3.0 | 3 | 51.783333 | -0.783333 |
모델 빌드
데이터를 훈련그룹과 테스트그룹으로 나누어 모델을 훈련합니다
1. 세 개의 특징(Seconds,Latitude,Longitude)을 X 벡터로 선택하여 학습하고, y 벡터는 국가 ID가 됩니다. 입력받은 값을 이용해 해당하는 국가ID를 반환합니다.
from sklearn.model_selection import train_test_split

Selected_features = ['Seconds','Latitude','Longitude']

X = ufos[Selected_features]
y = ufos['Country']

X_train, X_test, y_train, y_test = train_test_split(X, y, test_size=0.2, random_state=0)
2. 로지스틱 회귀를 사용해 모델을 학습시킵니다.
from sklearn.metrics import accuracy_score, classification_report
from sklearn.linear_model import LogisticRegression
model = LogisticRegression()
model.fit(X_train, y_train)
predictions = model.predict(X_test)

print(classification_report(y_test, predictions))
print('Predicted labels: ', predictions)
print('Accuracy: ', accuracy_score(y_test, predictions))
              precision    recall  f1-score   support

           0       1.00      1.00      1.00        41
           1       0.83      0.24      0.37       250
           2       1.00      1.00      1.00         8
           3       1.00      1.00      1.00       131
           4       0.96      1.00      0.98      4743

    accuracy                           0.96      5173
   macro avg       0.96      0.85      0.87      5173
weighted avg       0.96      0.96      0.95      5173

Predicted labels:  [4 4 4 ... 3 4 4]
Accuracy:  0.9609510922095496


C:\Users\samsung\AppData\Local\Programs\Python\Python39\lib\site-packages\sklearn\linear_model\_logistic.py:458: ConvergenceWarning: lbfgs failed to converge (status=1):
STOP: TOTAL NO. of ITERATIONS REACHED LIMIT.

Increase the number of iterations (max_iter) or scale the data as shown in:
    https://scikit-learn.org/stable/modules/preprocessing.html
Please also refer to the documentation for alternative solver options:
    https://scikit-learn.org/stable/modules/linear_model.html#logistic-regression
  n_iter_i = _check_optimize_result(
약 96%정확도를 보입니다.
Pickle
Pickle은 파이썬 객체를 직렬화(serialize)하고 파일에 저장할 수 있도록 지원합니다. 저장된 파일은 나중에 다시 열어서 원래의 객체로 복원할 수 있습니다.
따라서 모델 훈련 후 Pickle을 사용하여 모델을 저장하면, 나중에 쉽게 로드하여 적용할 수 있습니다.
다음 코드는 모델을 pickle 파일로 저장한 후, pickled 모델을 로드하여 초(second), 위도(latitude), 경도(longitude) 값이 포함된 샘플 데이터 배열과 비교 테스트할 수 있습니다.
import pickle
model_filename = 'ufo-model.pkl'
pickle.dump(model, open(model_filename,'wb'))
model = pickle.load(open('ufo-model.pkl','rb'))
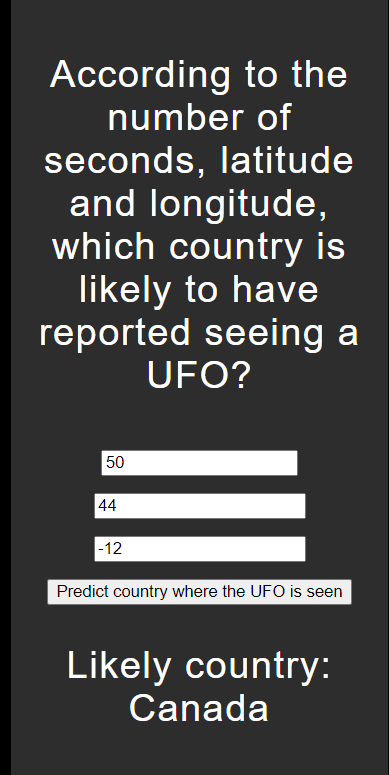
print(model.predict([[50,44,-12]]))
[1]


C:\Users\samsung\AppData\Local\Programs\Python\Python39\lib\site-packages\sklearn\base.py:439: UserWarning: X does not have valid feature names, but LogisticRegression was fitted with feature names
  warnings.warn(
Flask 앱 빌드
Flask란 웹 페이지를 만들 수 있게 해주는 웹 프레임워크입니다. 이를 사용해 웹페이즈를 인터넷에 띄우고, 트래픽을 감당하고, 회원들의 정보와 게시판 정보를 관리하는 것에 도움을 줄 수 있습니다.
- 프레임워크 : 사이트를 띄우는데 필요한 여러기능을 제공해주는 기능 모음
flask 설치
!pip install flask
Requirement already satisfied: flask in c:\users\samsung\appdata\local\programs\python\python39\lib\site-packages (2.3.2)
Requirement already satisfied: click>=8.1.3 in c:\users\samsung\appdata\local\programs\python\python39\lib\site-packages (from flask) (8.1.3)
Requirement already satisfied: blinker>=1.6.2 in c:\users\samsung\appdata\local\programs\python\python39\lib\site-packages (from flask) (1.6.2)
Requirement already satisfied: Werkzeug>=2.3.3 in c:\users\samsung\appdata\local\programs\python\python39\lib\site-packages (from flask) (2.3.3)
Requirement already satisfied: itsdangerous>=2.1.2 in c:\users\samsung\appdata\local\programs\python\python39\lib\site-packages (from flask) (2.1.2)
Requirement already satisfied: importlib-metadata>=3.6.0 in c:\users\samsung\appdata\local\programs\python\python39\lib\site-packages (from flask) (6.3.0)
Requirement already satisfied: Jinja2>=3.1.2 in c:\users\samsung\appdata\local\programs\python\python39\lib\site-packages (from flask) (3.1.2)
Requirement already satisfied: colorama in c:\users\samsung\appdata\local\programs\python\python39\lib\site-packages (from click>=8.1.3->flask) (0.4.6)
Requirement already satisfied: zipp>=0.5 in c:\users\samsung\appdata\local\programs\python\python39\lib\site-packages (from importlib-metadata>=3.6.0->flask) (3.15.0)
Requirement already satisfied: MarkupSafe>=2.0 in c:\users\samsung\appdata\local\programs\python\python39\lib\site-packages (from Jinja2>=3.1.2->flask) (2.1.2)


[notice] A new release of pip is available: 23.0.1 -> 23.1.2
[notice] To update, run: python.exe -m pip install --upgrade pip
이제 Flask앱을 빌드해 모델을 호출하고 유사한 결과를 시각적으로 더 보기 좋은 방식으로 반환할 수 있습니다.
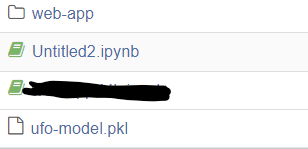
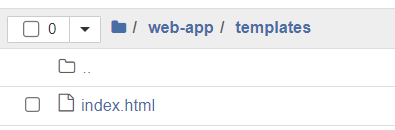
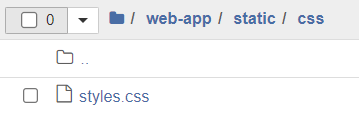
1. 먼저 ufo-model.pkl파일과 Untiled2.jpynb파일 옆에 web-app이라는 폴더를 만듭니다
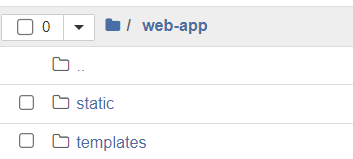
2. 생성된 web-app폴더아래에 static폴더와 templates폴더를 만듭니다.
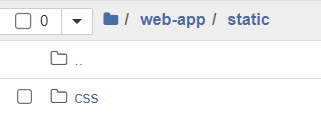
3. 이어서 생성된 static폴더 아래에 css폴더를 만듭니다.
4. web-app폴더아래에 requirements.txt파일을 생성합니다. JavaScript앱의 package.json과 마찬가지로 해당 파일은 앱에 필요한 것들을 나열합니다. 다음과 같이 추가합니다.
scikit-learn
pandas
numpy
flask
5. terminal로 들어가서 다음 명령어를 통해 web-app으로 이동합니다.

6. terminal에서 requirements.txt에 나열된 라이브러리를 설치합니다. pip install 사용


7. 다음과 같이 세개의 파일을 생성합니다.
- web-app폴더에 app.py를 생성
- templates폴더에 index.html을 생성
- static/css폴더에 styles.css를 생성

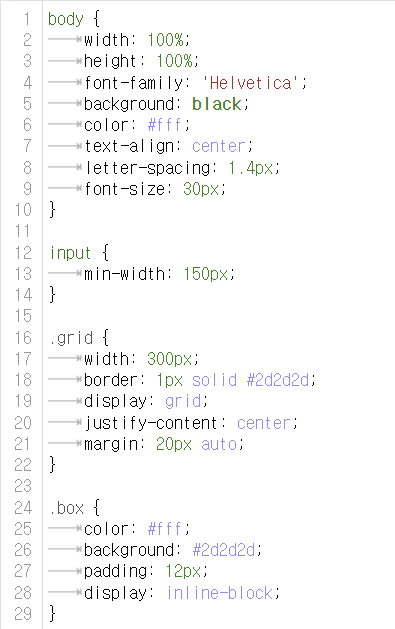
8. styless.css파일을 다음과 같이 작성합니다.
9. index.html파일을 다음과 같이 작성합니다.
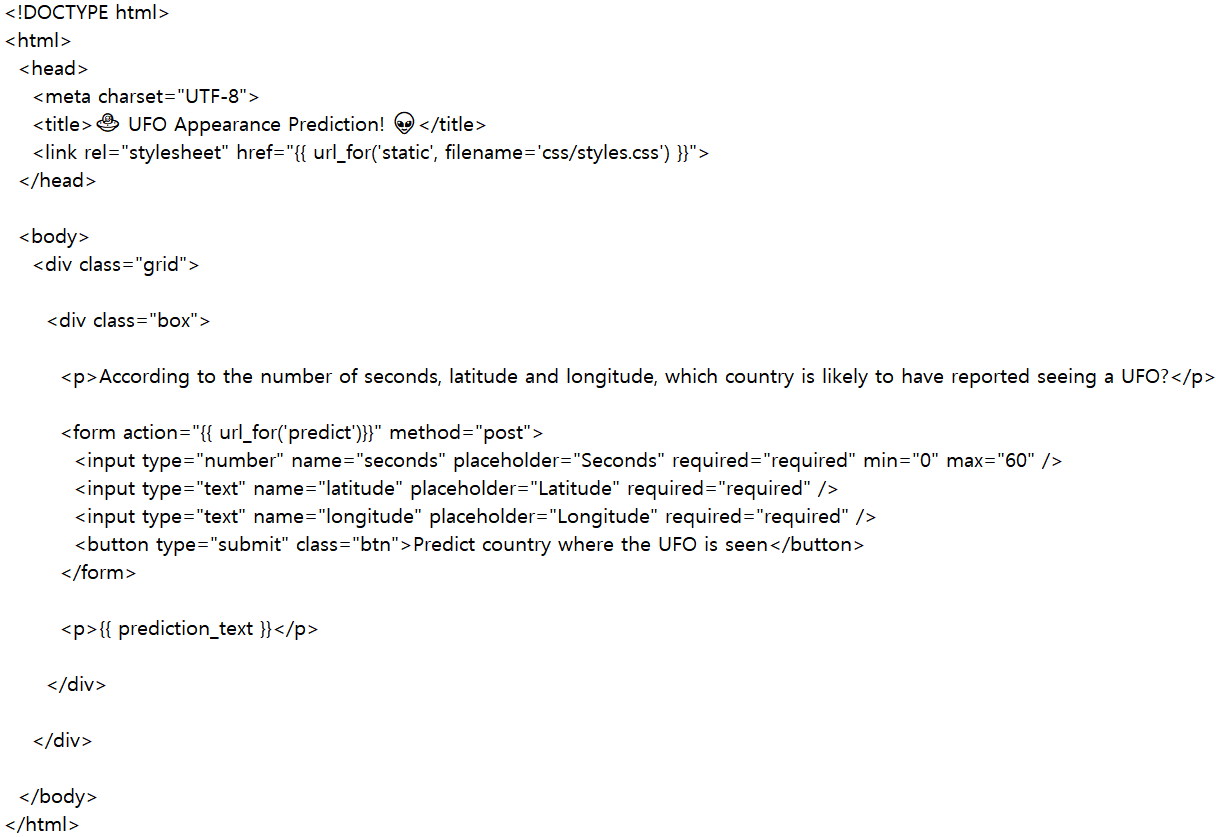
이 파일은 사용자에게 입력 폼과 예측 결과를 보여주는데 사용됩니다.
HTML과 CSS로 작성되어 있으며 Flask 템플릿을 사용하여 예측 결과를 렌더링합니다.
는 Flask 함수 url_for를 사용하여 /predict URL을 생성합니다.
10. app.py를 다음과 같이 작성한 뒤에 다시 terminal로 돌아와 app.py를 실행합니다. python app.py를 입력

- numpy, Flask, pickle 패키지를 임포트합니다.
- Flask 앱을 생성합니다.
- ufo-model.pkl 파일에서 미리 학습된 모델을 불러옵니다.
- home() 함수는 render_template() 함수를 사용하여 index.html 파일을 렌더링하여 사용자에게 보여줍니다.
- predict() 함수는 사용자가 제출한 데이터를 가져와서 불러온 모델을 사용하여 예측하고, 예측된 결과를 index.html 파일에 표시합니다.
- app.run(debug=True)는 앱을 실행하고 디버그 모드를 켭니다. Flask를 사용하여 웹 앱을 실행할 때 debug=True를 추가하면, 앱에 가하는 변경 사항이 즉시 반영되어 서버를 다시 시작할 필요가 없습니다. 단, production app에서의 사용은 주의해야 합니다.
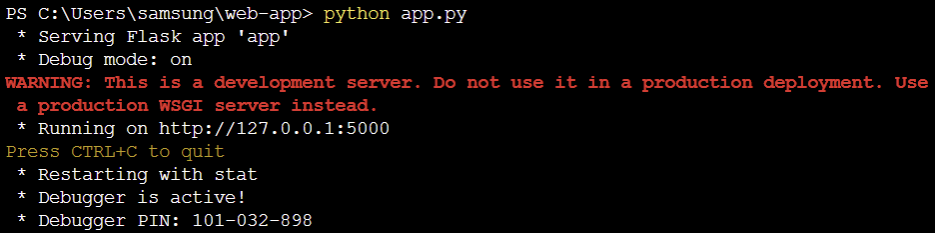
여기서 뜨는 경고 메세지는 “개발용 서버이기 때문에 실제 운영에 사용하지 말라는 경고 메시지입니다. 실제 운영에서는 WSGI 서버를 사용해야 합니다.”라는 의미입니다.
app.py의 app.run(debug=True)로 인해 127.0.0.1로 실행되어 로컬에서의 접속만 가능합니다. 또한 포트를 따로 설정해 주지 않았기 때문에 포트5000으로 실행이 됩니다.
만약 외부에서 접속을 하길 원한다면 app.run(host=’0.0.0.0’, port=9000, debug=True)로 수정해 주면 됩니다. 이렇게 수정을 하면 포트9000에서 실행되는 사이트를 모든 호스트가 접근 가능하게 됩니다. 여기서 host=’0.0.0.0’ 자기 pc의 ip를 가리킵니다. 만약 공유기 환경이라면 포트포워딩을 해줘야 합니다.
사이트 소개
해당 사이트는 Flask를 이용하여 구현한 UFO 관측 데이터를 바탕으로 어느 국가에서 UFO 관측이 있을 가능성이 높은지 예측하는 웹 어플리케이션입니다.
- 사용자가 입력한 폼 변수들(
Seconds,Latitude,Longitude)은 numpy array로 변환되고 모델에 전송되어 예측이 반환이 됩니다. - 출력하길 원하는 나라들은 예측된 나라 코드에서 읽기 쉬운 텍스트로 다시 렌더링되며, 해당 값은 index.html로 다시 보내져 템플릿에서 렌더링됩니다.
http://127.0.0.1:5000 사이트로 들어가면 “초, 위도, 경도 정보를 바탕으로 UFO 관측이 있을 가능성이 높은 나라는 무엇인가요?”라는 메세지와 함께 ‘초’,’위도’,경도’를 입력하는 란이 나옵니다.

임의의 초,위도,경도값을 순서대로 입력한 뒤에, Predict country where the UFO is seen 버튼을 클릭합니다.

해당 초,위도,경도정보를 바탕으로 UFO 관측이 있을 가능성이 높은 나라를 출력합니다.